We earn from qualifying purchases made via some of the links below (at no additional cost to you).
When people ask for beginner rope bondage advice, the response is often that they should pay to join an advanced shibari tutorial website. While information on the intricacies of shibari and rope suspension may be useful for people who are farther along in their rope journey, this isn’t an accessible entry point for those who are just starting out. Here, we’ve collected some essential, user-friendly tips and tutorials for rope bondage beginners.
Rope Safety
Bondage is more dangerous than it may seem. And we’re not just talking about suspension. Floorwork and so-called bedroom bondage can also pose serious risks if you don’t know what you’re doing. This is one reason you should never attempt bondage without EMS safety shears on hand. If something goes wrong and you need to get someone out of the rope immediately, this is generally a safe way to do it.
Two of the biggest risks with rope bondage are loss of circulation and nerve damage. Whether you’re the one doing the tying or the one getting tied, you must educate yourself about these risks.
We’re not medical professionals, but here’s the gist of what we’ve learned over time. Please do your own research as well via the links in the Additional Resources or through other reliable sources you find.
Loss of Circulation
Circulation is often restricted during bondage for obvious reasons. The rope bottom’s skin may darken, which is a normal reaction to compression on veins. This is usually not something to worry about as long as it isn’t sustained for longer than 20 minutes or so. It’s the top’s responsibility to reposition ropes or change the bottom’s position within that time frame to make sure circulation isn’t cut off for too long. It’s the bottom’s responsibility to communicate about numbness or loss of sensation.
The bigger concern regarding loss of circulation is that some of its symptoms—such as numbness or reduced sensation—mirror those of nerve damage. And nerve damage can be quite serious.
Nerve Damage
To quote directly from Rope Study’s excellent guide on nerves and circulation, “nerve damage is the most insidious danger of rope bondage. It can happen instantly or gradually over multiple scenes. It can be masked by circulation problems. It can heal in an hour or a month or a year . . . or never.”
The most common causes of nerve damage during rope bondage are direct or indirect pressure on nerves and restricted blood and oxygen flow to nerves. Symptoms of nerve damage include tingling or burning, numbness, or loss of mobility. It’s important to note, however, that sometimes there are no symptoms at all.
We learned this the hard way in the early days of our bondage experimentation. Vagabond tied Mimsy’s legs together with a gap in between. She then spent 20–30 minutes straining pretty hard against those ropes, putting a lot of pressure on her thighs in the process. The next morning, the tops of both thighs were numb. We belatedly learned that the kind of tie we used probably caused temporary damage to sensory nerves in Mimsy’s legs. Fortunately, her legs were back to normal within a week, but it was still a scary reminder that bondage is dangerous.
These are some best practices to follow to help mitigate the risk of nerve damage:
- Avoid placing rope on top of sensitive nerve areas, including joints. Familiarize yourself with where these areas are by studying diagrams. Major groups of nerves exist in the arms, torso, and legs—the body parts that are most often used in rope bondage.
- Limit the duration of rope bondage. The longer someone is tied up, the greater the risk tends to be. As noted above, rope should be adjusted, repositioned, or removed entirely every 20 minutes or less.
- Don’t tie the ropes too tight. Ropes should be tied tightly enough to remain stable, but not any tighter than that.
- Be aware of rope tension and collapsing knots. Take special precautions in situations where the ropes can loosen or tighten with accidental tension from either partner. And avoid collapsing knots, meaning knots that slide and tighten. A lark’s head is an example of such a knot.
- Use wide wraps to create more surface area and make sure tension is distributed evenly across each rope in a wrap to reduce pressure. Thicker rope (such as rope that’s 8 mm in diameter) can be safer and more comfortable. Thinner rope may be pretty and easy to tie with, but it can really dig into skin.
Vetting Rope Tops
There are numerous resources available for people learning how to tie, but as a rope bottom, how can you be sure the person tying you knows what they’re doing or at least plays safely within their skill level? This is where vetting comes in.
Vetting is the process of determining whether a potential play partner is safe and someone you want to play with. BDSM educator Evie Lupine highlights a number of important questions to ask a rope top, such as
- How frequently do you tie?
- Do you know the signs of nerve damage?
- Tell me about a time when something went wrong during a rope scene. How did you handle it?
In addition to interviewing a rope top yourself, it’s also best to see them tie in public and ask people in the community about that person’s skills, if possible.
Additional Resources
- Reducing Risk: This is an excellent resource by Rope Study for learning about bondage safety, nerves and circulation, and more.
- Basic Safety: This is an excellent safety guide from Topologist’s rope bondage tutorial site, Crash Restraint. It includes videos on how to check for nerve damage.
- Better Bottoming: Vetting, Skills and Safety Tips for Rope Bondage: In this video, Evie Lupine covers how to interview prospective rope tops, red flags to watch for, and the importance of doing your own research as a bottom.
- The Rope Bottom Guide: This free downloadable guide with photos covers basic safety for rope bottoms, including how to vet riggers and how to mitigate nerve damage. Available in multiple languages.
Basic Ties
When you’re starting out with rope bondage, it’s best to focus on learning a few fundamentals before trying anything fancy.
Single-Column Ties
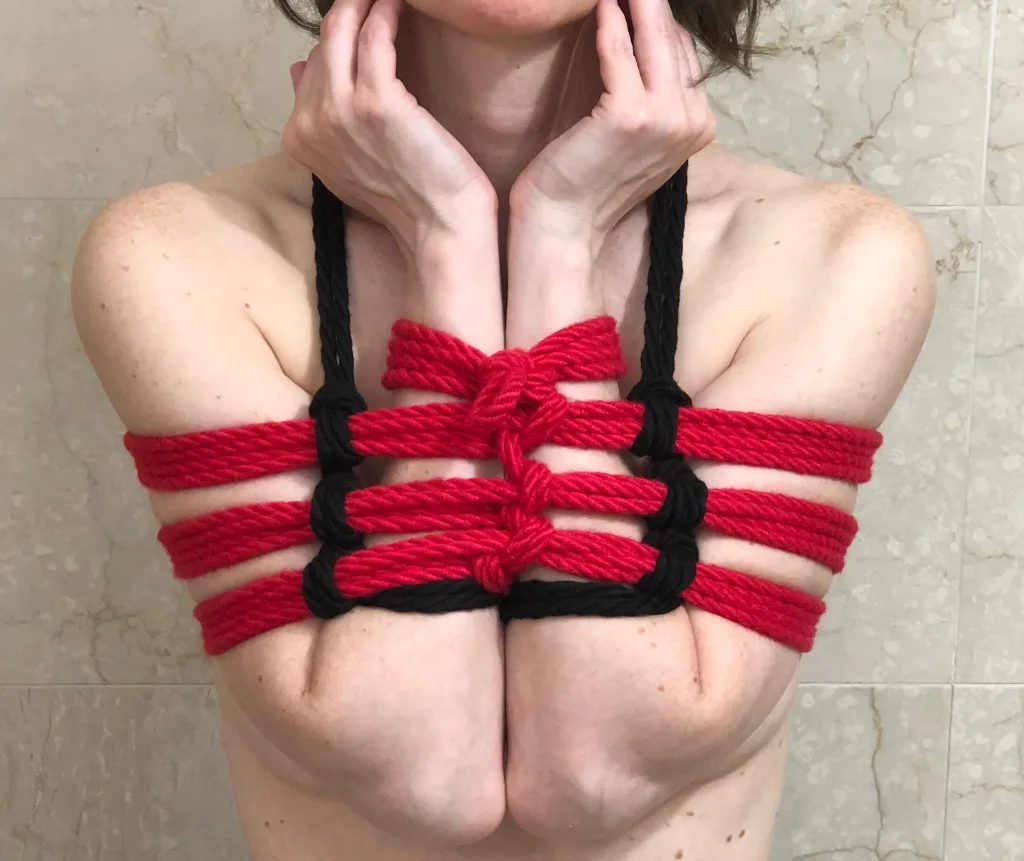
A single-column tie is a simple, non-collapsing cuff around one part, or column, of something or someone, such as a bedpost, wrist, or ankle. Sometimes the “column” might be a pair of wrists held together, like in the popular box tie (TK) or the cage knot, pictured above. Most multistep bondage ties start this way, which is why it’s important to learn. There are several ways to do a single-column tie, but these are a couple of the easiest:
- Lark’s head/half hitch combo: We cannot say enough good things about Shay Tiziano. She’s an accomplished self-suspension performer and excellent BDSM educator who is also a medical professional. In this video, she clearly demonstrates how to tie a basic version of a single-column tie using two simple knots called a lark’s head and a half hitch. She demonstrates on herself, which makes it easy to follow along if you’re practicing on yourself.
- Somerville bowline: Who better to demonstrate this tie than Topologist, the rigger who named and popularized the tie in the bondage community? This is the preferred method of single-column ties among many bondage enthusiasts because it’s a very secure knot that won’t collapse on itself and is relatively easy to untie. Topologist shows how to tie it on another person, but the instructions are easy to follow for self-tying as well.
Double-Column Ties
A double-column tie connects two columns with some rope between them, such as two cuffed limbs, a limb and a bedpost, etc. As with single-column ties, there are multiple ways to do double-column ties. Here are two beginner-friendly options:
- Lark’s head/half hitch combo: In this video, Shay Tiziano uses the same techniques as in her single-column tie tutorial to show how to tie a simple double-column tie. She demonstrates on her own legs.
- Basic double-column tie: We opted to highlight this clean and compact double-column tie from Topologist because of his outstanding instruction. He explains every step in detail.
Simple Bondage Positions
Once you can confidently tie single- and double-column ties, you can move on to some basic positions that are easy and fun for rope bondage beginners. Here are a few of our favorites.
- Pocket sling: This quick and simple position taught by bondage expert Midori involves minimal knots and provides easy access to the rope bottom’s genitals, which makes it a great position for sex. This was one of the first bondage positions we tried together, and it proved that you don’t need to use complicated ties to restrain someone effectively for sex.
- Happy baby: This position, taught by Topologist, is similar to the pocket sling in that it pushes the bottom’s legs up and apart. This is another easy and fantastic position for sex for that reason.
- Alien baby harness: Harnesses are a fun way to experiment with rope, and even the simple ones are often aesthetically pleasing. (The name of this one reflects Midori’s quirky sense of humor; it doesn’t look like an alien baby.) You can attach a vibrator to this harness, which will cause the entire structure to pick up on the vibrations, including the crotch rope.
- Pentagram harness: This upper body harness demonstrated by Two Knotty Boys is a nice option for accentuating a rope bottom’s breasts. There’s no voice-over narration in the video, but the ties are simple and easy to follow regardless.
Additional Resources
- Twisted Monk: Twisted Monk’s free videos use spoken instruction and focus on ties that can be learned quickly by a beginner. As an added bonus, they sometimes include the fabulous rope artist Midori.
- The Duchy: This extensive and colorful site provides both illustrated step-by-step instructions and well-made videos, some of which are free. If you become a member, you get access to more tutorials.
- Crash Restraint: This site is a free progressive rope learning class by Topologist that goes into detail on the hows and whys of equipment and ties. The site is moderately well maintained, but some of the more advanced ties have missing videos.
- How to bundle rope: This video shows an easy and convenient way to bundle and store your rope.
For detailed information on how to select rope for rope bondage, see our Bondage Rope Roundup. And check out our Rope Resources page for additional tutorials, books, and more on rope bondage!